
Google Search Console
In this article, we are going to learn how to use Google Search Console. Now, the question arises What is meant by Google Search Console?
Google Search Console is nothing but a simple tool to understand how it sees your site, what issues might be affecting your traffic, and how you can improve the site for better rankings and results. It used to be known as Google Webmaster Tools or Google Webmaster Central.
Some of the great things about Google Search Console are:
- It’s completely free
- If any support needed for your site, it is directly provided by Google itself.
- Helps to maximize the SEO results.
How to Sign Up with Google Search Console?
- Visit https://www.google.com/webmasters/
- You should have Gmail Account to Sign In to Google Search Console. If you don’t have any you can create it here.
- Once you signup you want to follow the steps mentioned below to add your website to Google Search Console.
Adding the website:
At first, you need to set up a Google Search Console account in order to track and analyze the website. After creating an account you need to verify it. Before that, you need to follow some steps for adding and verifying your site.
STEP 1: Click on the ‘Add Property’ button on the left side of the drop-down menu.
STEP 2: Then, just enter your site name. It is categorized as https and http.
STEP 3: You have to verify that you own the site. At this step, Google provides different types of verification methods for your site. Some of the verification methods provided by Google are:
- HTML file upload
- Domain Name Provider
- HTML tags
- Google Analytics Tracking Code
- Google Tag Manager Container snippet codes
The easiest way for verification is adding the tracking code to the index.html or index.php of your site/blog. The interesting thing is that if Google hosts your site/blog, it will be automatically verified.
Dashboard:
After verification, you will start seeing the data on your website. Sometimes, it may take some time to collect the data. But the process will be started. Now, let’s see the tools available on the dashboard which helps to measure, collect, analyze the data. The tools are:
- Overview
- Performance
- URL inspection
Overview:
It gives you an overview of everything from what keywords you are ranking for to how much traffic you are getting. In addition, it shows the errors causing by the Google Bot when crawling and the number of links of your site. Another major thing is the list of pages in which Google has indexed.
Performance:
It provides a detailed view site’s performance and breakdown happening in Google.
URL Inspection:
This is used to check the URL of a site. It can be any URL. Type the URL in the search bar which is presented at the top of the screen and you will view the reports like how Google sees your site.
Site Index:
The main purpose of the site is to configure the site for better ranking of the website. Under the site index, you have two menus. They are covered and sitemaps.
Coverage:
The user sometimes felt that some of the pages of the website should not be indexed by Google. The pages that should not index by the Google are: RSS Feeds, Private login areas, etc., The coverage tab displays some basic reports if the site. The different types of reports are:
- Pages with an error
- Valid with warnings
- Valid
- Excluded
You should try to have zero pages and warnings of your site/blog. The number of valid and excluded pages depends on what you’d like Google to index, and what you want to keep private. By creating a robots.txt file you can block not just Google, but all search engines from accessing web pages that you don’t want them to get their hands on. A robots.txt generator and tester, not only to create a robots.txt file, but you will be able to see if it is done correctly before you upload it to your server.
The whole website should not be indexed and if any important pages of your indexed, you can report directly to the Google by request.
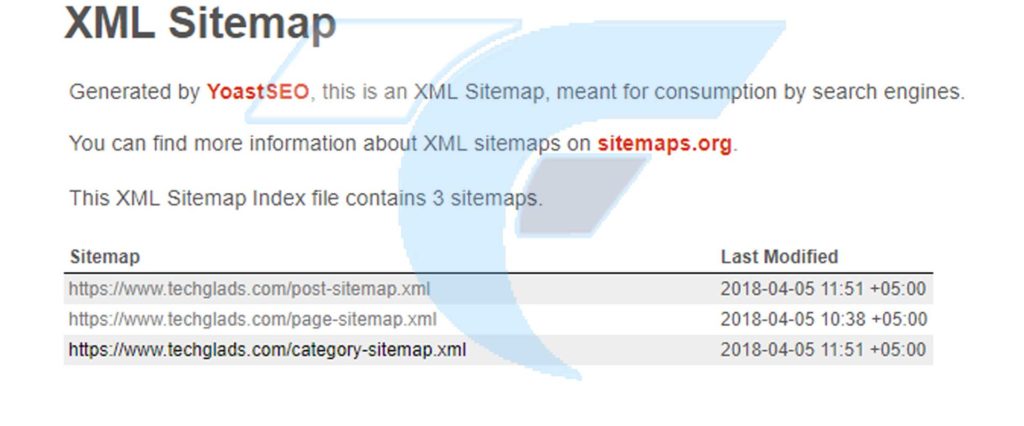
Sitemaps:
Sitemaps are an easy way for webmasters to inform search engines about pages on their sites that are available for crawling. In its simplest form, a Sitemap is an XML file that lists URLs for a site along with additional metadata about each URL (when it was last updated, how often it usually changes, and how important it is, relative to other URLs in the site) so that search engines can more intelligently crawl the site.
You can check the TechGLADs sitemap here – https://www.techglads.com/sitemap.xml
Sitemaps have to be submitted in an XML format and they can’t contain more than 50,000 URLs. If the limit is exceeded, the sitemaps should split and submit on separate files. If you have more than 50,000 URLs then you can How to Add a Sitemap for more than 50,000 URLs? because there is a possibility to do that.
The creation of the sitemap is simple. Just enter the URL of your homepage and click “start”. Once your sitemaps have been uploaded, Google will tell you how many of your URLs are being indexed. The goal of the user should get many pages indexed as possible.
At sometimes, pages aren’t being indexed it’s because the content on those pages isn’t unique, the title tags and meta descriptions are generic, and not enough websites are linking to your internal pages.
Enhancements:
The one and only option under enhancements are Mobile Usability. The advantage of enhancement is to load every page on sites with zero errors on your mobile.
Other options present in the menu bar are:
- Manual actions
- Links
Manual actions:
If your site gets affecting by spam, you will be notified here. The only thing you should see on this page is a “No issues detected” notification – anything else means you’ve done something wrong, and you need to fix it immediately.
Links:
The links report provides a wealth of data about where your site is receiving links, what those links say, and where they’re linking to. It is divided into three categories. They are
- Internal Links
- External Links
- Back Links
Internal Links:
These are the links from within your site. When you link to a page from another page, it tells Google that page is important to your site. When you don’t have any internal links, you would not be able to get much page ranks and also cannot be available in search listings
External Links:
These are the links, which will be used to link other website pages.
Back Links:
The best way to increase your rankings on Google is to get more sites to link to you. Backlinks are often considered to be the top ranking factor Google uses.