

Open Graph Open Graph was introduced by Facebook in 2010 to allow the third party websites to be readable by Facebook. This will happens by assigning rich “graph” objects to websites with information, which is then sent to Facebook when a page is liked or shared. It enables any webpage to become a rich object in social media. Have you ever experienced when you shared a webpage on Facebook or any other social media and noticed that there was an incorrect description being displayed or preview thumbnail was missing and unrelated image was appearing? If you share any webpages online, there should be correct images and description displayed or else the potential customers could be discouraged from clicking through. Unrelated description and the unrelated image will spoil the customers trust in seconds. Open Graph will relieve you from such issues. By using open graph meta tags, Facebook itself will choose what content and the images could be displayed if you share a website on Facebook. These tags will helps you to increase the conversion rate and click-through rates. The Main Open Graph Meta Tags There are many meta tags below are the most required tags.
- og:title -> It’s the title of the content that you sharing on social media.
- og:image -> the image that will be displayed when you share a page.
- og:description -> It’s similar to meta description tag added for SEO purpose.
- og:url -> It’s the canonical URL of your post.
- og:type -> This is essentially what your object is; blog post or article.
You want to add the below links in the source code of a website to implement open graph to your site.
<meta property=”og:title” content=”Title of your Post”/>
<meta property=”og:type” content=”article”/>
<meta property=”og:url” content=”http://www.domain.com/article/”/>
<meta property=”og:image” content=”http:// www.domain.com/articleimage.jpg”/>
<meta property=”og:description” content=”A description of your post.”/>
Complete Open Graph – WP Plugin The another simplest way to add the open graph meta tags is by using the plugin. There are many plugins available in WordPress, Here I am using the complete open graph. Complete Open Graph provides automatic, comprehensive, just-makes-sense Open Graph management, no matter it’s for a simple blog or a complex site with the sets of content. This plugin will generate all the basic tags that your site should have and also make the site ready to share on social media.  Install & Activate the Complete Open Graph plugin. After the activation, Complete Open Graph is ready to generate open graph meta tags. There is no configuration required for this plugin. On each page and post, the following fields are automatically generated, based on available page data. Many of these can be manually set at the page/post level. Various fields are available in this plugin such as:
- og:site_name
- og:locale
- og:type
- og:title
- og:url
- og:description
- og:image
- og:image:width
- og:image:height
- twitter:card
- twitter:creator
- twitter:title
- twitter:description
- twitter:image
- twitter:url
- twitter:site
It will appear like below image. You can fill these fields to as per your wish. 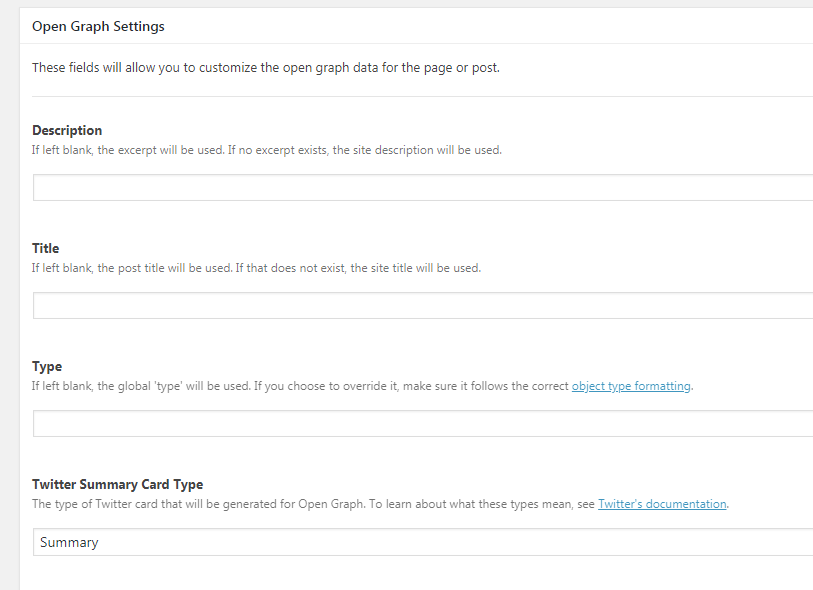 After filling those fields, the website is ready to share on social media.
RELATED ARTICLES
How to choose the right plugin for your WordPress website?
Choose the right plugin for wordpress website, where you must consider few metrics before installing it, most importanly review and security
Checklist on How to Perform Security Check For Website? « TG
Security Check For Website is essential & unavoidable. Checklist has to be systematically followed to strengthen overall website security
Features of Yoast SEO – WordPress Plugin
Yoast SEO is a WordPress SEO Plugin with Excellent features that helps the users to do the White Hat SEO for Positive ranking on SERP.
5 Best Free WordPress Themes For Blogs & Business | Tech Glads
Best Free WordPress Themes for blogs and business that will be handy. Themes which has best in support, reviews, and performance are listed
What is Permalink and How to Change in WordPress?
What is permalinks in wordpress and how to change it is explained with step-by-step images. Set custom permalinks for pages and posts.
How to Publish a Post in WordPress – Simplest Way
Before getting into the topic “How to publish a post in WordPress” all must know why we need to publish a post in our website. One of the biggest reason for blogging is to build a successful business.